Malta in September 2022 – Mdina

Written by Gary on October 6th, 2022

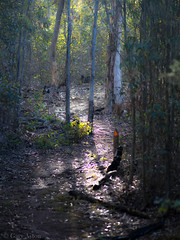
Mdina is the old former capital of Malta, originally founded in the 8thC BC by the Phoenicians given its position on a high plateau making it naturally defensible, it is primarily a fortified Medieval city thought to have been built in the 8thC AD by the Byzantines to defend the threats from the Arabs.

It ceased to the be capital when the Knights of St John were given the island and moved the administrative capital to Birgu.

According to tradition when Paul the Apostle was shipwrecked on Malta, he cured the governor’s sick father and the city converted to Christianity. Paul was also allegedly bitten by a snake and tradition has it that he cast out all the venomous snakes from Malta.

It has some Baroque features added in the early 18th century.

It is one of the favourite places for tourists as it is less busy than most other tourist destinations in Malta, and its high walls offer shade from the summer sun.


Malta in September 2022 – part 1 – Valletta

Written by Gary on October 6th, 2022

Finally now that the Covid-19 pandemic issues have settled somewhat, I was able to get back to international travel and my first destination was the little island of Malta.

Malta in September is still very warm and humid with day time temperatures generally reaching 32-34degC and overnight minimums falling to only 22-24degC.

This means you need to either sleep with air conditioning on all night, or do as I did, sleep in a mosquito/sandfly proof (No-See-Um) mesh tent on balconies and rooftops to really take in the nocturnal balmy summer ambience. Perhaps the locals could take a leaf out of my book and save electricity and the environment.

Sand flies are a significant concern in much of the Mediterranean and this includes Malta and Sicily as these sand flies are true sand flies of the Phlebotomus genus (not the biting midgee “sandflies” found on Australia and NZ beaches), and they can carry the amoebic parasite which causes Leishmaniasis which is hard to prevent (without ensuring no sand fly bites) and not easy to treat – not something anyone wants to catch! The sand flies live in storm water drains and are active overnight so having skin exposed whilst walking at night or going to restaurants is a significant risk especially in September when they are at their peak activity.

Valletta is the main old town in Malta apart from Mdina and is a great place to explore although very touristic and so the restaurants and cafes do target the tourist trade.

Here are a few images that I captured on my first night there wandering around.

Valetta at dusk

Next up will be the old town of Mdina.


Review of OzTrail Fast Frame Blockout 4 Person Tent

Written by Gary on February 20th, 2022

This “4 person” tent is a touring style tent designed with a fast set up frame and the fly has an extra layer to blockout sunlight or other lights which makes it cooler to be in during the day time and a good option for festival goers as well as those traveling to summer camp sites by car.

Being a touring tent it allows one to stand inside the tent and has a porch with awning. The tent is large enough for a deluxe single person stretcher bed, and as a result, this tent is MUCH heavier and has a MUCH larger packed size than a hiking dome tent. It packs to 110 x 22 x 22cm and weighs 15kg.

Disclaimer: I purchased my tent online and have not been sponsored by any party in relation to this tent and I have used it now for about 20 nights of camping but only as a one person tent with a stretcher bed.

Tent set up

tent ready to set up


Inner canopy with fast frame being set up – just open the legs outwards as above, then bend the leg hinges to the opposite direction as they are in the photo, then extend the legs to reach full set up – very easy!


Inner canopy set up

Inner canopy set up showing the front door (the rear door has red corner pole holders). If a strong wind were to push two walls inwards making the frame hinge angle the opposite way, the frame will collapse. Hence the importance of the fly being attached to the frame and guy ropes preventing the walls being pushed inwards.

Main features I liked

Inner canopy with the fast frame design:

  • does indeed set up very fast within 2 minutes and folds down just as fast
  • has a large front AND rear door for versatility
  • has two very large mesh windows – one on each side
  • has two vent windows – one on each side which could be very useful on hot nights or during the day
  • the doors, windows and the low vents all have zip up inner fabric for total privacy or reduced wind chill
  • even with window and door fabric layer fully unzipped leaving only mesh for maximum ventilation on warm nights, you still get a LOT of privacy – people need to walk within 1-2m to see you sleeping on the floor!
  • the mesh is No-See-Um to stop even the midges getting in and being black affords a degree of privacy if the inside is dark
  • the ceiling has 4 large mesh windows so you can see the stars if you don’t use the fly
  • there is a hook for a suspended ceiling light and the height of the ceiling is a generous 195cm
  • there are two power cord points – one at each end
  • the 240x220cm PolyOxford floor seems to be sufficiently durable with careful use and is appears to be adequately waterproof – tested in a 25mm overnight rain event which resulted in some water pooling under the tent but no water made it inside the tent from the floor – very impressed! This floor is far better than the crinkly, noisy, cheap polyethylene floors of the more budget models!

Fly with the blockout material:

  • Blockout seems to work great and does indeed provide for a better experience during the day time in summer although I have not tested it on sunny days over 25degC but at least there are lots of ventilation options to support it – any tent will be hot if ambient temperatures are more than 30degc
  • the Blockout makes the inside nice and dark during the day and if there is no direct sunlight coming in, this adds a lot of privacy even if your door is fully open
  • material seems adequate
  • when properly set up with full guy ropes and pegging, it stabilises the tent extremely well even in strong wind gusts, I have used it on many nights at The Prom with 60kph gusts all night and n damage (but used strong sand pegs and good guy ropes).
  • has a reasonably large front vestibule, large enough for a small chair and small table, and the door can be unzipped and turned into an awning with the supplied poles.
  • rear door can also be turned into an awning – I often add a tarp as a side wall for added wind protection.
  • window covers can rolled up or can be guyed out to provide rain protection whilst allowing ventilation and also have a mesh layer for further privacy and reduction in wind chill
  • fly is rated at 3000mm waterhead which is sufficient – and in testing it worked extremely well in a 25mm rain event overnight with drops of water coming from the rear awning seam. This is much better than the 1500mm rated flys of the cheaper lighter models!

Aspects I did not like or could be improved:

Inner canopy with the fast frame design:

  • is very unstable in strong winds if the fly is not used and is liable to collapse and be damaged, but at least it can be used alone if no winds or rain is forecast and you want a rapid set up to view the stars or to easily move sites. Inner tent needs to have guy out points so it can be used without the fly in stronger winds – I suspect the next version in 2023 will have this as Oztrail have added this to their new 3P Fast Frame tent.
  • is much more difficult to set up with one person in strong winds as it really needs the fly with guy ropes in place to stabilise it in these conditions
  • there are only 2 corner pockets which are often too far away to reach from your stretcher bed
  • the door and window inner fabric does not zip down low which makes it impossible to watch the local wildlife on the ground outside your tent
  • unlike a dome tent, it is impossible to roll it over on its side to dry out the under-floor before packing up as it will just collapse – you will probably need to pack it wet and dry it when you get home before storage – an option may be to hang it upside down fully assembled or just have it suspended to help it dry the floor out

Fly with the blockout material:

  • as with all such tents, the fly takes about 20-30minutes to set up – pegging, multiple velcro attachments to the canopy frame which are important, and guy ropes if it is windy – unlike a dome tent, you really don’t want to be moving it to a different site in strong winds by yourself – choose a sheltered site in the first place if strong winds are forecast!
  • hard to throw the fly over the tent if you are a short solo camper without a helper – you may need to lower the frame to do so
  • harder to set up in a strong wind with only one person and does possibly risk the frame getting damaged which would make the tent useless
  • supplied guy ropes are not adequate to stabilise the tent in strong winds resulting in possible frame damage as above (this is especially the case with the larger dual hub 6P version) – buy some heavy duty ones!
  • supplied pegs are inadequate – get some decent ones – if you are carrying that weight, the extra weight of better pegs is not an issue!
  • the toggles that are used to hold the windows rolled up are poorly designed and easily rip out
  • the eyelets on the awnings are too small to allow OzTrails adjustable tent poles to fit (but at least there are elastic rings you can use instead) – I prefer adjustable poles to the supplied poles as in rain events the awning can be lowered to reduce water pooling on it.
  • the Blockout layer does start to rub off over friction areas over time.

Quality control:

Admittedly you do get a lot of tent for the money, however, there are a number of issues I have already encountered with this tent but I still love it for the price:

  • an important buckle which attaches the fly to the inner canopy corner was already broken when the tent arrived (this issue has been reported by multiple purchasers on review) – I had to add a clip on device to the tent fly as a workaround as replacing the buckle would require an industrial sewing machine.
  • the window toggles break very easily if you pull too hard – I have replaced this with a workaround
  • peg quality is just OK – on testing it in well watered lawn in the urban backyard, one of the pegs bent with minimal effort and they also would not suffice in sand – just buy better pegs!
  • guy rope system keeps coming lose in winds – buy better guy ropes!
  • the ceiling mesh developed a tear on packing/unpacking – still can’t work out how that happened – perhaps I was too fast! – fixed with mesh repair tape.
  • carry bag could have been bigger – it is a tight fit – I decided to store the fly separately for transport home – when packing up in the rain, I either put the tent and fly separately into the pod on my car roof, or wrap the inner tent in a tarp and pack the fly in its bag.

For extra warmth it even fits a 2P dome tent!

A freestanding 2P dome tent without its fly such as the MacPac Apollo will fit snuggly inside this tent and this can give you the best of both worlds in cold weather.

The 4P tent gives you height for getting changed in clothing more comfortably as well as extra weather protection and amenity.

A 2P full fabric dome tent allows a smaller air space to allow your body and any additional heaters such as 12V electric heating mats to heat up the air that you breathe. This can be a very useful technique if you suffer from asthma or cold-induced coughing. It can also provide an extra measure to combat mosquitoes. Your stretcher bed will also just fit inside the 2P dome tent as well which brings your face closer to the warmer air at the top of the 2P tent. You could also get more cold protection by covering the dome tent with insulating materials without worrying about the weather compromising them as the 4P tent will protect it.

Conclusion:

I do really like this tent.

It is a great tent for ONE person with a deluxe stretcher – only one of these will fit and even so it is a little cramped – a couple would be better going for the 5P or 6P version for glamping comfort.

I love it for warm summer nights with no rain and minimal breezes – works well without the fly in these conditions and really does become a rapid set up and take down option with excellent flexibility in terms of privacy vs ventilation vs wind chill protection while still being able to see the stars through the ceiling mesh – and the rear door is a real benefit!

If mild rain is forecast and you want to just use the inner canopy as above for super fast set up and take down, a 1.8×2.4m, or better still, a 2.4x3m tarp thrown over the top and clamped to the poles (get 4 strong clamps from Bunnings) provides adequate rain protection with the inner fabric of doors and mesh zipped up. If it gets a bit windy you can tie down the tarp with guy ropes to further protect the tent.

It is also great with the fly on for summer camping and the blockout and ventilation makes it a viable option for sleeping in during the daylight hours and you won’t be woken by the early sunrise – but I would be very careful in site selection and use of good guy ropes and pegs if the forecast is for wind gusts over 50kph.

The RRP is $AU549 but can be found on special for around $AU279 making it a great value option – if you have space for it in your car!

The Australian distributor is Oztrail.

For those paranoid about mosquito-borne viruses then although this tent has excellent insect protection, mozzies getting in undetected when you open the door zips can still be problematic as with any large tent – a great solution I have tried is to hook up the Sea 2 Summit Mosquito Net (double) which will drape very nicely over your large single stretcher bed (I have the Wanderer Premium Ultra Comfort Folding Stretcher King Single which is very comfy and just fits this tent nicely) and allow even greater mozzie protection. Alternatively, you can set up the Oztrail 2P Mozzie Tent inside which works well and means you can leave the main tent doors unzipped but there is no room to walk around it – the Oztrail 6P version solves this space issue but is substantially more difficult to set up for one person, 3kg heavier and longer to pack.

A comparable tent with similar features is the Coleman Instant Up 4P Gold Series Evo Tent – 4 Person but it has a smaller vestibule (and no vestibule arch poles) and no ceiling mesh nor blockout and is more expensive.

The Coleman Instant Up 4P Darkroom tent is exclusive to Anaconda, is lighter at 13.9kg, a little cheaper, but no rear door, no ceiling mesh, the fly is only 1500mm rated and the floor is a noisy, crinkly budget polyethylene.

The Coleman Northstar Instant Up 4 Lighted DarkRoom Tent is closer to the specs of the OzTrail 4P tent as it does have the blockout and the larger vestibule but still no ceiling mesh although you do get LED lights and it is considerably more expensive.

See also my photography and camping wikipedia – more Touring Tents.


Comet Leonard and meteor from Australia

Written by Gary on January 4th, 2022

Comet Leonard (C/2021 A1) has been creating quite a buzz in the Southern Hemisphere as a “Christmas comet” for 2021.  It had been a nice comet for those in the Northern Hemisphere in early December 2021.

Unfortunately it was a bit too dim for people to see with the naked eye unless in a dark sky area and even then it can be difficult making binoculars are useful adjunct.

Nevertheless, for astrophotographers it has been a fantastic comet which brightened in December 2021 and developed a lovely long tail and a greenish head due to short-lived dicarbon molecules being generated by UV light.

For a comet of this brightness close to the sun, astrophotographers had to wait until it was far enough from the sun so that twilight effects reduced sky glow and they had to seek a relatively dark sky region so light pollution effects were minimal, while timing it so the moonlight would not interfere and one had a clear night relatively free of clouds.

To get the best imagery, the camera needed to be mounted on some tracking device to allow longer exposure times without star trails, and the best would then take many such images and stack them in post-processing software to reduce the image noise.

Here is one of my single shot images tracked for a 20sec exposure which also happened to capture a nearby meteor.

Comet Leonard

This image was shot on 29th December 2021 with a Sony a7RIV camera with a Samyang 85mm f/1.4 lens at f/1.4 ISO 3200, uncropped and post-processed in OnOnePhotoRAW 2022.

Comet Leonard is a long period comet with an orbit which takes 80,000 years.

It was discovered in January 2021 and had its closest approach to Earth was on 12th Dec 2021 at 34.9 million km then it made a close approach to Venus of only 4.2 million km. It had its closest approach to the Sun (perihelion) on 3rd Jan 2022.

More information about comets in my wikipedia.


Camp ground etiquette

Written by Gary on December 10th, 2021

Most people want to go camping to get away, engage with nature, get as good as sleep as possible and have minimal problems.

Many enjoy their time away from other people while others like to take the opportunity to connect with other campers.

Here are some important general principles to consider to help you and others have a more enjoyable and stress-free experience.

It should not need emphasizing but one should be aware of, and comply with the rules of the camp ground.

LEAVE NO TRACE

see https://lnt.org/learn/7-principles

clean up after yourself

avoid fire scars

do not contaminate waterways with toileting or non-biodegradable soaps

ensure you choose your site carefully so there is no need to dig trenches

RESPECT others

Ensure your fun is not adversely impacting others.

Minimise noise (especially at night)

don’t get drunk

  • you are more likely to become loud and aggressive
  • you are more likely to injure yourself or others (eg. falling into a fire or not doing safety checks with gas BBQs)
  • your sleep will be adversely affected and you are much more likely to snore loudly

turn off loud music at a reasonable time

do not use power generators when others are around (these are banned at many sites)

do not use chainsaws near camp sites

do not use noisy dirt bikes near camp sites

moderate your childrens behavior

don’t take dogs that tend to bark a lot

Respect their privacy

do not walk into other camper’s sites without their consent unless it is an emergency to help them

ensure you tell your kids not to walk or ride bikes into other occupied camp sites and this includes care using torches at night such as looking for wombats and tell them not to ask for food from other campers – these can create difficulties

ensure your pets are not straying into other tent sites

don’t have your car headlights aimed at their tent

give others space

many prefer to sleep naked – it’s your responsibility as parents to keep your kids away from them and let them enjoy being at one with nature and as long as they are doing this discretely they should be allowed to do so without people making a fuss of it. Remember it is illegal in Australia to publish intimate photos of other people in public places without their consent if they take offense to it.

remember it is illegal in Australia to use drones within 30m of other people, at night, over populous areas such as beaches and they are illegal in National Parks without a permit.

Respect their assumed rights

most camp grounds have a first in, first served policy such as those who arrive first get to choose their camp site first, and many doing so also reserve sites for their friends or family – these people should do so in a reasonable manner

obviously do not commit criminal offences such as theft. Some campers do leave chairs or table on vacant sites to reserve them.

If there are pit toilets, leave the seat down to reduce the flies.

BE KIND but don’t be intrusive

offer help but understand some will prefer to not accept it at that time

a hello is not necessarily an invitation to dinner – that should be an explicit invite made to you

BE PATIENT and TOLERANT

some campers will snore loudly and its usually not their fault (unless they got drunk) – be prepared and bring your ear plugs or noise cancelling headphones

avoid getting upset, agitated or aggressive but do make polite communication of reasonable requests of others if their behaviour is impacting others

be tolerant of transient non-sexual nudity – surfers getting in and out of their wetsuits, people getting changed discretely outside their cramped tents, people discretely having a pee in the bush.

DO NOT FEED WILDLIFE including birds

this is generally bad for their health and tends to make them aggressive to people at meal times when they don’t get food

SEE MY WIKI for HEAPS of camping, hiking and photography information


Escaping Melbourne’s winter blues to sunny Echuca

Written by Gary on May 29th, 2021

Melbourne is well known for its propensity to have 4 seasons in one day, especially in Summer when it can be blistering hot 45DegC with strong north winds and then within an hour much cooler with strong southerly winds thanks to its geographical position which exposes it to frequent cold fronts from the Southern Ocean or from around Antarctica.

But in Winter, it can generally be relied upon to be cool to cold thanks to its latitude of around 38deg South and sitting south of the Great Dividing Range.

Fortunately for Melbournians it is only a 2.5 hour drive north over the Great Dividing Range to Echuca on the Murray River which may give a very different winter experience with sunny days and temperatures a few degrees warmer than Melbourne (although colder nights thanks to being inland and away from coastal maritime moderating influences).

Echuca was an important inland port on the Murray River in the late 19th and early 20th centuries after it was founded by Henry Hopwood in 1853 when punts and a pontoon bridge made it the only means of crossing the Murray and Campaspe Rivers. In 1855 Major Thomas Mitchell purchased allotment in 612 High St on which he built a hotel.

In 1864, Echuca became an increasingly important inland port when the Melbourne-Echuca railroad was completed allowing paddle steamers to transport wool from Darling & Murrumbidgee Rivers as far north as almost the Queensland border to Melbourne where it was then exported overseas.

In the 1870’s Echuca’s paddle steamer and red gum timber industries flourished to make it the largest inland port in Australia and second only to Melbourne as a port. Eventually though, the success of the railroad was to adversely impact the paddle steamer industries.

After a severe drought in 1914 which left most of the Murray River as a series of pools, work began in the 1920’s to construct dams and weirs along the river to better control flows and allow the steamers to run consistently.

Today, Echuca is mainly a tourist attraction with its historic port, historic paddle steamers, house boats, golf courses, nearby wineries, and being adjacent to the largest red gum Eucalypt forest in the world – one can drive a 4WD alongs its tracks (when not flooded) for some 380km including the adjacent Barmah forest to its north-east and the Gunbower National Park along the Murray to it west which have popular dispersed camping locations.

dispersed campsite along the Murray River with spray painted cricket stumps on a tree

Above is my photo of the beautiful red gums at a dispersed camp site along the Murray River in Gunbower National Park – note the spray painted cricket stumps for campers to enjoy a game of cricket.

If camping in the forest, you should not camp under branches of these trees, especially in Summer or Autumn after a drought as some of these trees tend to drop their branches suddenly and without warning and this can be lethal. Branches 10-30cm in diameter are more prone to fall and often have no signs of structural weakness and hence are very difficult to predict the risk.

One should also be aware that in the warmer months, especially after floods or heavy rains, mosquitoes can be problematic and these may transmit various viruses such as Murray Valley Encephalitis virus, Barmah Forest virus, and Ross River virus.

More information and links relating to Echuca can be found on my wikipedia here.


2P tents for warm and cold nights in 2021

Written by Gary on April 22nd, 2021

Most people camping solo will prefer the extra space of a two person (2P) tent at a mild cost in weight when compared to a very restrictive one person (1P) tent.

These will be much more livable, especially when it is raining and you need to wait a few hours for it to stop,  allows you to have your backpack stowed more securely and of course, they are just big enough for a cosy night for 2 people.

There are many, many 2P tents available.

Budget entry level ones may be very inadequate in providing a safe waterproof shelter and may be too bulky and heavy to carry, so in this blog I have concentrated on the medium to higher end price bracket dual wall tents which should withstand a decent downpour and strong winds and keep you warm and dry while providing adequate ventilation options to minimise internal condensation which would otherwise make you wet and cold.

Some “4 season” tents are really only optimised for alpine and snow conditions for which they are fantastic but tend to lack sufficient ventilation options for use on warm nights unless you fully open the doors and risk bugs and more uninvited guests.

Many 2P tents have a mostly mesh inner “canopy” part and these are fantastic when there are warm nights, especially if you wish to take the fly off and stare at the wonderful dark Milky Way skies and count the falling stars. They will generally be lighter and still keep you dry when it rains assuming you have the fly on.

However, when the temperatures drop below 10degC, you may prefer an inner canopy made mostly of nylon fabric to reduce wind chill over your face and body, but still have dual layer large doorways which give you the option of fantastic cross-ventilation in mesh only mode on warm nights, or any degree of mesh vs nylon fabric to allow versatile adjustment of cross-ventilation to optimise temperature control and mitigation of internal condensation.

If you want to understand more about condensation in tents, see my wiki page here.

I have thus created a comparison table of a selection of 4 such tents, each have their pros and cons and you will need to decide what is important to you.


Comparison of four quality 2P tents

feature Sea to Summit Telos TR2 PLUS MacPac Apollo Mont Dragonfly Exped Orion II
price on sale $AU879 $AU349 on sale
$AU999 $AU1199
season usage 3+ season 3-4 season 4 season and still great in summer 4 season and still good in summer although consider Extreme version with silnylon UV fly
best for.. ultralight hiking in warm or cool areas tough design great for 2x schoolkids or car camping; alpine hiking; very spacious all purpose tent; tall people; 1-2 adults hiking; unprotected sites eg. Iceland, alpine base camps; high rain/wind cool-cold climate areas; car camping for those with bad backs
weight 1.7kg 2.8kg 2.5kg 3.2kg
packed size 13 x 13 x 48cm 56 x 21cm 44x18cm + 45cm poles 42 x 16cm
storm / wind proofing ?good very good excellent excellent
livability in prolonged rain 1P dubious, inner space the smallest; OK excellent as spacious, waterproof floor and zip ceiling vents excellent thanks to large vestibules and doors
set up in rain without inner getting wet yes no yes with footprint? yes
pole attachment clipped via tunnel sleeve clipped via tunnel sleeve
poles 8.5 and 9.0mm 8.5mm T6 9.6mm DAC 9mm DAC
colours green or grey blue with white inner green with yellow inner red or green with yellow inner
inner tent 20D nylon with mesh ceiling vent and mesh upper part of doors 40D all nylon 20D all nylon (15D on 2020 model) 30D all nylon
floor 30D 8000mm floor 70D 10,000mm 70D, 25,000mm 70D 10,000mm
fly 15D silPeU 1200mm with apex vent silPU 1500mm with above door overhang vents 30D sil PU 2000mm with above door vents which align with inner vents which can allow nice bird hide capability 40D PU 1500mm with above door overhang vents (Extreme has SilNylon)
inner height 105cm 115cm? 110cm 125cm
internal width 109 to 134cm 130cm 140cm 130cm
internal length 215cm 210cm 220cm 215cm
internal area 2.62sqm 2.86 sq.m 3.08sq.m 2.7sq.m
vestibule width 75cm ?75cm 77cm 95cm
vestibule area 1.6sq.m 1.8sq.m   2.3sq.m
ingress/egress good good good excellent
door size   100x100x88cm (approx)    
dual layer door NO, 2/3rds nylon, upper 1/3rd mesh full, rolls up to non-wind end full rolls up to centre of tent full, rolls up to centre of tent
door position triangular base at end triangular starts at non-wind end central triangular base at end central D doors
door rain protection with fly open OK if pegged out OK if pegged out but need to bring a clamp to do so as no peg hole on the door that opens seems good but only if pegged out, no protection if folded back very good as deep vestibule overhang
ridge pole upward concave to give extra height to doors NONE std convex convex to ground
ability to open wind end vestibule yes, entire fly can be opened at each end and left attached in middle for fast closure if rain comes yes but no tie back so need to bring a clamp yes also has part way peg holes no, unless remove ridge pole and use guy ropes
fully nylon sealed inner dust proof mode NO yes yes yes
zippable open inner vents only upper part doors? only doors doors and ceiling vents – all dual nylon/mesh only doors
can set up without fly yes and can also have fly attached in middle and ready to apply yes yes yes but more difficult and need guy ropes
can set up with fly only yes and can be used as Hangout sun shade mode with trekking poles to elevate one end no ?possibly with footprint yes, easy
extra features Hangout mode; fly can stay on in middle only; pack comes in 3 parts for sharing and also doubles as tent pockets and diffused holder for ceiling lamps; tough design for kids with proven durability to last over 20 years of hiking; poles pass through inner tent’s tunnel attachment which can wear out over many years and does prevent setting up with fly only; use as a bird hide; has most waterproof floor and the strongest poles which double cross; gear loft; 3 ceiling carabiners; extra height for tall people; large doors; hybrid tunnel design with ridge pole to ground; gear loft;
other versions mesh version: $AU849 3P version Polaris NB. 2020 version only has 15D nylon inner; 2021 version has 20D; Extreme version has UV protected silnylon fly but gets saggy and takes longer to dry when wet; Orion III is a 3P version;

My MacPac Apollo review:

I personally own the MacPac Apollo for my car camping and have found it to be a fantastic tent for the price and it has survived gale force winds and prolonged chains of thunderstorms but it is a little heavy for solo hiking as it is primarily designed to withstand the stresses of school kids hiking with it for which it is a great choice.

It sets up very easily – just thread the two poles through the inner canopy tunnel sleeves then slot the ends into the canopy corner tags. Place the fly over the top securing it to the poles via the velcro tabs then peg it out.

My main relatively minor criticisms of it are:

  1. the door overhangs could be wider to reduce rain spray when you have the vestibules unzipped – personally I prefer the addition of a ridge pole as with the other tents here.

2. the vestibules are not designed to be fully opened one is designed to remain pegged which is probably good for school kids to increase stability if unattended in the wind, but requires you to bring a clamp if you wish to have it kept completely open.

3. there is no true ceiling vents, but the cross-ventilation available by keeping the top part of each door open as mesh is a reasonable compromise.

4. as the poles thread through the tunnel sleeves of the inner canopy, it cannot be set up as a fly only option or set up with fly first in the rain.

Summary

Any of these tents in the table would be great for hiking especially when the weights are shared between two people, although the Exped Orion II is getting a touch heavy and for a little extra weight, I think I would prefer the Exped Orion III 3P tent for its extra height and livability and particularly if I was car camping or I was a tall person.

If I was hiking solo, the Sea to Summit Telos TR2 PLUS would be high on my list given its versatility and lighter weight but unlike the others it cannot be “fully” sealed from dust and sand blowing around in a gale, and it is not really a full 4 season tent.

Perhaps my personal preference of the four for all round versatility and livability, especially if I am mainly car camping, or hiking in the colder months or in alpine areas, the Mont Dragonfly is winning me over and after getting inside one, I think the ceiling vents could allow it to be a handy bird hide even in the rain and of course it does have the most waterproofed flooring of all four of these tents.

If you are on a budget, the MacPac Apollo is a great option for two hikers or for car camping.

See more of my camping tips on my wikipedia.


Portable power for on location and for camping

Written by Gary on February 28th, 2021

It is now easier than ever to have power available for your devices on location or if you are camping remotely.

For most people, a system based on a LiFePO4 lithium battery will be the easiest, lightest (around half the weight), charge 3-4x faster, more stable voltage outputs when discharged to lower levels and are least expensive option in the long term as these batteries have 5-10x more recharge cycles and are able to go down to much lower levels without harm to the battery than much heavier lead acid based batteries.

Lead acid cranking batteries are designed to be fully charged most of the time and to run at high under-bonnet temperatures and if allowed to run flat will dramatically shorten their life span.

Deep cycle lead acid batteries are designed to regular discharge to around 50% but are not designed for cranking. These were the traditional “second battery” option but are not being superceded by LiFePO4 batteries for this purpose.

LiFePO4 batteries do not tolerate high temperatures over 50degC (thus not suitable for use under the bonnet), nor sub-zero temperatures and generally do not like to be continuously trickle charged but allow much better life spans when regularly discharged deeply (5-10x the recycles of a lead acid battery).

How much battery storage will you need?

Most campers will want around 100-120Ah LiFePO4 battery as a nice compromise for weight, price and capacity. These batteries weigh 10-14kg depending on model and quality and a good one can be had for around $AU750-1000.

Take care purchasing cheap LiFePO4 batteries as they may have quality and longevity issues, lack of water/dust sealing, as well as requiring brand-specific chargers and may not be able to be used in parallel configuration with other batteries (although most people will not need this).

Suggested batteries in Australia:

Perhaps the best way to understand this is to convert everything into Watts and Watt-hours rather than Amps and Amp-hours as the latter are dependent upon the voltage of the system.

No of Watts power usage = Amps per hour x Voltage

No of Watt-hour capacity = Amp-Hours capacity x Voltage

Thus to calculate how much capacity you need in a 12V battery you will need to determine:

  • how much you want the battery to get exhausted to before re-charging (with lead acid batteries this is probably around 50% of capacity, but with LiFePO4 batteries you may accept something like 20% of capacity)
  • how often and how much you can re-charge the battery (see below)
  • the total number of watt-hours your devices will use in that period between recharges

Some examples of use needs:

A modern 36L car fridge such as a Dometic Waeco CFX3 35 which is full of items already at 4degC and with lid closed properly and minimal lid opening times will generally run at 12W or so (1amp per hour at 12V).

Thus to run such a fridge, you need 24 amp-hours a day or around 288 watt-hours, and thus a 100 amp-hour LiFePO4 12V battery should last you a few days without re-charging.

If you need to run a 240V AC sine wave inverter to power a device, use the watts (a laptop or a single electric blanket may run at around 65W on AC) and then covert to amp-hours at 12V by dividing the watts x hours of use by 12V.

What about power banks for smartphones?

These are very handy devices and they are much smaller than 12V car batteries, but they are 5V systems so to compare with a 12V battery, their amp-hour capacity of these should be converted to watt-hours.

In addition, they usually have a maximum output of 2.1A at 5V USB (10.5W).

Portable power banks for smartphones are often rated at 10000 or more milliAmp-hours capacity or 10Ah at 5V which would give 50 Watt-hours capacity. The equivalent power capacity in a 12V battery would be a 4Ah 12V battery.

Furthermore, many of the capacity ratings on these power banks are erroneous and misleading and often stated as “theoretical capacity”.

Some however, are designed for use as a cranking battery for starting a car and come with clamps to do so which can be very handy indeed!

The battery box:

A battery box is a very useful housing for your battery as it not only protects it from damage which may cause it to explode, and minimises chances of its terminals being short-circuited, but it allows for convenient charging inputs and power outlets such as cigarette lighter and USB outputs, as well as providing an indicator of the current voltage of the battery which is a very approximate indicator of capacity remaining.

Most battery boxes come with bi-directional 50A Anderson plugs.

Some come with 175A Anderson plugs for starting your car HOWEVER, these will NOT work with LiFePO4 batteries or Deep Cycle lead acid batteries – neither of which are designed for use as cranking batteries!

Make sure it is well built with ergonomic and strong handles.

Examples include:

HardKorr Battery Box

But what about all-in-one Power Stations?

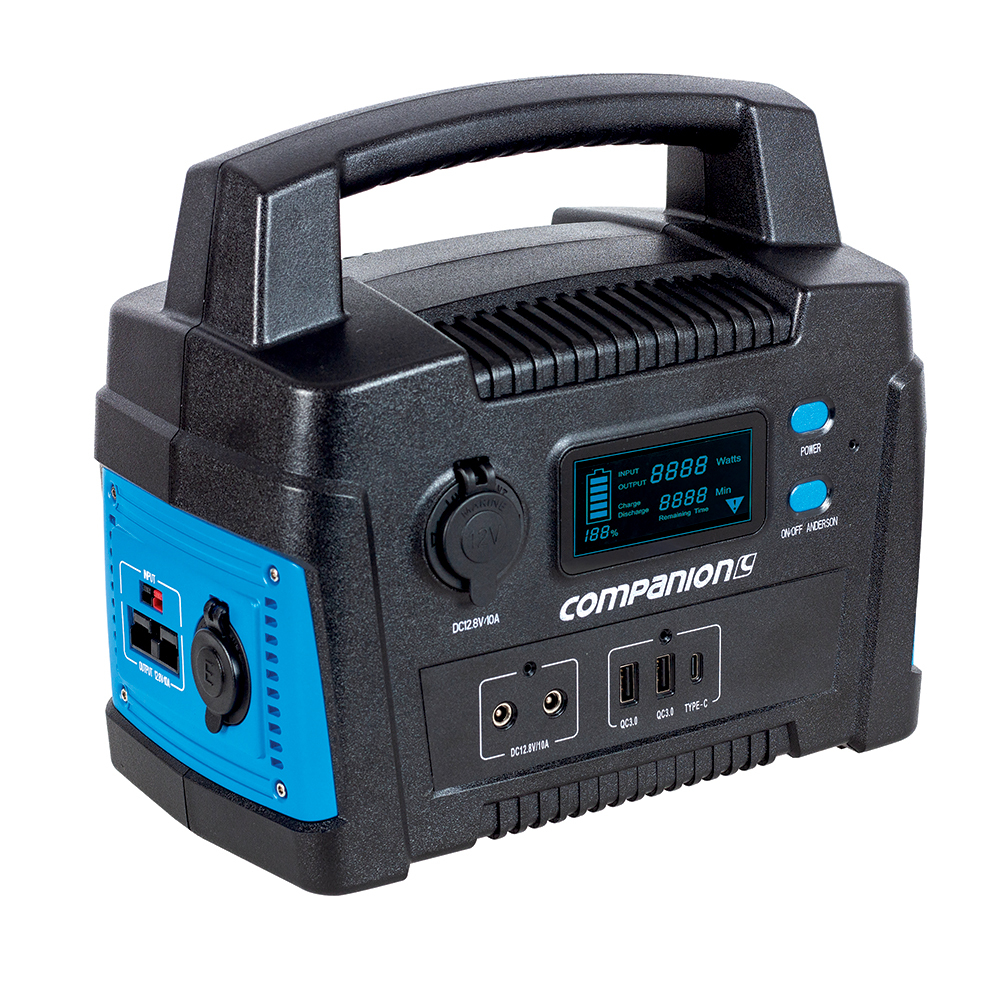
A “Power station” is a very convenient option as it houses the battery, the charger, the outputs and inputs and often includes a built-in AC sine wave inverter and AC 240V outlets.

The most common problem with these are that the battery is often only around 25-50Ah and the chargers tend to be lowly rated around 5A which will mean it will take overnight to charge it on AC power and there may be no option for faster charging when you need it.

Examples include:

  • Companion Rover lithium 40AH Power Station
  • Hyundai 1000W / 2000W max LiFePO4 Lithium Power Station AC/DC
  • Sunovo SPS500

Companion 40Ah Power Station

How do I know how much battery charge is left?

This is referred to as State of Charge or SOC.

The default method is by looking at the battery voltage and making a very rough guess – unfortunately, a small change of 0.1V may equate to a large change in battery charge of perhaps up to 20-30%.

For instance, for a 12V LiFePO4 battery, 13.4V may equal 99% charge, 13.3V = 90%, 13.2V = 70%, 13.1V = 40%, 13V = 30%, 12.9V = 20%, 12V = 9%

Note that you can buy in-line power usage meters with Anderson plugs on either side (eg. this 200A one) which are very useful for assessing load draw from your devices or the amount of solar charging and whilst they do display Ah, this is the total current that has passed through the unit since connected, this is NOT the residual battery capacity and they do not measure SOC!

The more accurate method is to purchase a battery capacity meter (aka coulombmeter) which connects to a shunt device which is inserted into the positive feed from the battery terminal, but most people forego the hastle of wiring these up.

Renogy 500A battery monitor with shunt

How to charge your system

240V AC power battery charging:

The most basic way to charge your LiFePO4 battery is via connection to a Lithium-capable AC charger such as a Victron IP65 15A charger.

This needs connection to a standard 240V 10A power supply (12V 15A is only 180W and thus only 0.75A on 240V power supply – this is why I suggest converting amps to watts to understand what is happening better with different voltage components) and at 15A output will take a couple of hours charging per day to cover a day’s worth of fridge use (as outlined above).

The Victron 15A charger can be set to low current mode of 4A if you become desperate and wanted to charge it via a cigarette lighter AC inverter. Car cigarette lighters are 12V and limited to 10A or 120W and thus trying to run a 15A (ie. 180W) charger will blow the fuse, hence the need to place it into 4A low current mode before connecting it.

You can buy 25A chargers to charge more rapidly but these are bigger, heavier and more expensive.

Whilst you can also use a petrol generator to output power for these chargers, these are unpopular in camp grounds and banned in many camp grounds especially those with large numbers of campers.

If you have installed an Anderson plug on the outside of your car and you can connect the internal connection to your battery, then you can charge your battery via your AC charger through this plug without need to run a cable through a window and risk rain coming inside the car.

In car, DC-DC charging via the car’s alternator:

1 hour driving with a 25A DC-DC charger will thus provide for around 1 day of fridge time (as outlined above).

This requires wiring your car up to enable a “dual-battery” system which adds cost but the benefits are enormous – you can charge your battery at 25A or even 40A depending upon the DC-DC charger you buy, and some of these chargers also can connect to solar panels to preferentially take current for the solar panel instead of the car alternator.

You cannot just connect your LiFePO4 battery to your cranking battery, as a minimum you need:

  • a 40A or larger fuse on the positive wire near your cranking battery in case of short circuit
  • a 40A or larger fuse on the positive wire between the LiFePO4 battery and the DC-DC charger and near as possible to your LiFePO4 battery in case of short circuit
  • appropriate sized wiring 6B&S or smaller 8B&S grade wiring from the cranking battery terminals to your DC-DC charger and then to your LiFePO4 battery, all carefully joined and protected from damage
  • DC-DC charger situated close to the LiFePO4 battery and which prevents the cranking battery from being drained when the car is not running and which can handle a variable voltage input, and output it at higher voltages above 14V in order to adequately charge these batteries – an example is the RedArc BCDC1225D 25A DC-DC and solar MPPT charger.
  • for cars manufactured after 2006 which have variable voltage alternators to save fuel,  you will also need to connect the charger to an ignition wire
  • the black negative wires may need grounding by connecting to the car chassis
  • for ease of use, most people will join all the power wires by utilising 50A Anderson plugs
  • optionally, if using the above Redarc charger, it’s yellow cable can be connected to the +ve on an externally mounted Anderson plug so that you can directly plug in a solar feed to the charger.

Solar panels and solar blankets:

Most people probably don’t need a solar solution if they have a DC-DC charger installed and they are not planning on camping for days on end without driving the car.

The latest solar solutions are much lighter and smaller, and one should look for panels which are waterproof, durable and have blocking diodes so that partial shade on the panels does not stop the total current outputs.

If you have a DC-DC charger with solar regulator in-built such as the Redarc above, you must not use another solar regular in the same system even if one is supplied with the panel or blanket.

If you are going to directly charge your LiFePO4 battery make sure you use a solar regulator capable of charging lithium batteries (preferably a more efficient MPPT regulator rather than the older PWM regulators).

Solar panels output higher voltages than 12V, usually to around 22-24V. You will need to check the maximum output voltage as solar regulators have a maximum solar voltage they can take (the Redarc has a maximum 33V, other DC-DC chargers may have lower voltage limits).

As the solar panels output at higher voltages, a very approximate indicator of how many amps you will get at 12V charging your battery is the wattage rating of the panel in full sun – mostly you will be looking at 150-200W panels.

Examples include:

Some blankets can be folded, some ultrathin “panels” can be curved to fit mounting on curved roofs such as the Renogy flexible 175W which can flex to 248deg or the Kings semi-flexible 160W which can flex to 30deg.

Other issues to consider include:

  • preventing theft
  • preventing damage from people or animals walking on them
  • preventing them being blown over in the wind (obviously heavier ones may be better here)
  • connecting to your battery – bring your battery outside to charge and risk theft vs having an externally mounted Anderson plug on your vehicle

Highly recommend you install an external Anderson plug on your vehicle

Install one under the rear of your car and have the cable run into the boot of your car where it has another Anderson plug (and preferably you wire it so that the black cable is also grounded to the car chassis).

This allows for a lot of versatility and can be used as either:

  1. Connecting your solar panels to charge your main battery or your auxiliary battery
  2. Charging either battery but with an AC battery charger
  3. Running an Anderson extension cable into your tent and add a cigarette lighter output into your tent so you can run your laptop via USB-C, or charge your smartphones or other devices including USB heating pads or a 12V air heater, or even an AC inverter (just ensure the latter do not create fire risks in the tent)!

To charge your main cranking battery via this Anderson port, ensure the boot Anderson port is plugged into the Anderson port that leads to the main battery – if using solar power you will need to have a solar regulator in the system.

To charge your auxiliary battery via this Anderson port, ensure the boot Anderson plug is plugged into the Auxiliary battery. If using solar and you have a DC-DC charger in the boot which also has solar regulator functionality, then you can plug the boot Anderson plug into the “solar input Anderson plug” of the DC-DC charger.

To use the external Anderson plug to power your devices, ensure the boot Anderson plug connects to the auxiliary battery, preferably with a fuse near the battery.

You may wish to disconnect the boot Anderson plug when not in use to avoid other people hooking up to your car and draining your battery or damaging your system.


[SOLVD] Windows 10 Update corrupts 4Gb file then CHKDSK deletes it!

Written by Gary on September 16th, 2020

I thought I would share a little tail of woe so that I won’t repeat it and hopefully others can find a way out of a similar situation without going into a melt down!

It all started this week when my frail old Samsung Slate 7 laptop with a miserly 4Gb RAM and 120GB SSD drive (with only 10Gb free) which I dedicate only to programming, all of a sudden started really slowing down while I was in the middle of programming with a critical 4Gb password encrypted Veracrypt file open (stored on a 120Gb microSD card).

There was no indication of what was happening, no message that hey, Microsoft is enforcing a major background update to Windows 10 without telling you and it is screwing up your Windows big time not to mention making it almost totally unresponsive!

The taskbar started doing weird stuff, all attempts to open up the Task Manager to see what was going on failed. I decided to save my work and close my programming environment down just in case this was a hardware failure or a virus.

I think the first error I made at this point was to forcibly re-boot the computer.

Windows started up again and it now looked like perhaps a background update was happening and I then was asked to install driver software updates – but still no explicit message from Windows that it was indeed installing an update.

I let the system do its thing this time and waited until the activity resolved.

I went into Veracrypt to open my file and to my horror, it said it can’t read the file as it was corrupted.

Yep probably because the laptop was running so slowly when I saved it, it had not completely saved the file to the micro SD card.

No problem, been here before, I will run Mcrosoft’s CHKDSK to scan and repair the SD card – big mistake this time – it deleted my precious file!

Google sent me down a rabbit hole of further despair

I jumped onto Google to see what I could do to retrieve it from the ether and Microsoft’s site said to download and install their Windows File Recovery app from the Store – I did so, and ran it but this failed with an error which indicated the card was still corrupted.

Google search then informed me that I should do a CHKDSK again but this time with CHKDSK /f /r and this took for ever and notified me that it had found the lost files and converted them into a number of files called FILE*.CHK with folders called FOUND.xxx

It is possible the CHKDSK was actually needed to be run as I am not sure the following solution would have worked without first repairing the drive.

Perhaps Microsoft’s Windows File Recovery would now work – I decided not to trust it.

Time to BUY software to recover files!

This was NOT looking good so I decided it was time to buy software that purports to recover such files deleted or corrupted and spent some hours reading reviews and trying to ascertain which would suit my needs the best.

I settled upon purchasing EaseUS Data Recovery Wizard Pro version and installed this on a different laptop then used it to scan the Micro SD card which took about 20 minutes for the Advanced Scan – thankfully it not only found those FILE*.CHK files that CHKDSK had created in hidden folders but also a “deleted” seemingly intact version of my critical file dated the previous day – it recovered this file nicely to my laptops C: drive (NOT to the same SD card as this would be problematic for other potential file recoveries!) and I am very pleased and much relieved to be able to tell you it works perfectly – Veracrypt had no trouble opening it and the embedded files all worked perfectly!

Interestingly it also found the names of presumably every file that has ever been on that SD card as it stated there was over 570Gb of them – seeing as the card was only 128Gb in size I am sure most of those older files would not be retrievable as they would almost certainly have been over-written.

Furthermore, it seems that when you open a file volume in Veracrypt and make changes to the contents and you then close the file volume, Veracrypt deletes the previous version which stays on the drive as a hidden deleted file (assuming there is sufficient space) as in my case above, and writes a totally new file. In other words Veracrypt actually makes a hidden backup for you automatically although over time this runs the risk of being over-written.

It did also allow me to recover the hidden 4Gb FILE000.CHK to my C: drive and after renaming it back to it’s original name it, the FILE000.CHK also amazingly opened in Veracrypt without a problem.

There is a free version of EaseUS Data Recovery Wizard but it only allows recovery of files up to 2Gb in size.

Some tips!

  1. Prevention is better than cure – ALWAYS back up your files and do it frequently!
    • Given my laptop resources and the slow file transfer time for a 4Gb file from the micro SD card to an external backup drive, I had become lazy and forgotten to do a backup in the last 4 weeks – Covid state of mind perhaps – don’y namke my mistake if you have important files, in my case it would have taken me 50 hours + to re-program everything I had lost – even if I could remember how I did it!
  2. Do NOT save ANYTHING to the drive which has a corrupted or deleted file until you have recovered it – doing so may prevent recovery!
    • thankfully I recognised the problem before I accidentally saved other files to the drive and it was nice it was on a SD card and not my C drive as I could install software on a different drive even a different computer and then move the SD card across.
  3. Think twice about using CHKDSK but if it does DELETE you file there is software out there such as EaseUS to recover it as long as you obey tip 2.
    • I was always dubious about these utilities but it worked beautifully and easily this time for me so this one gets a thumbs up from me and he saved me many hours of work so I am not going to begrudge the money I paid for it.

Now that I have fully backed up my micro SD card, I think it prudent to re-format it to give it a cleaner start.

Following full formatting, I ran the EaseUS again and no files were detected, so if you want to clean your drive then formatting will help get you there – presumably there may be other tools which could still recover files but at least EaseUS wont do it. Note that if you only do a Quick Format, EaseUS can still detect and recover the files!

Hope this helps someone – it certainly will help remind me what to do next time this happens – and unfortunately there will be a next time.


The new Canon EOS R6 – a full frame Olympus OM-D E-M1 III on steroids?

Written by Gary on July 11th, 2020

Back in 2007 to address the deficiencies of my Olympus E510 budget travel dSLR, I bought a pro sports dSLR – the 1.3x crop sensor Canon 1D Mark III supposedly acclaimed for its fast burst mode shooting and subject tracking AF. This camera was built like a tank, but its acclaimed AF system also tanked – issues with the mirror box and AF accuracy plagued this model.

All I really wanted from Canon is a well weathersealed camera with accurate eye AF and effective sensor-shift image stabilisation with an adequate sensor, nice compact and light ergonomics, good build quality.

The ONLY cameras in the subsequent decade to offer these simple requirements were the Olympus OM-D series – first the E-M5 Mark I and then I upgraded to each of the E-M1 models with their built-in grip and PDAF for fast moving subjects.

Meanwhile Canon slept, and slept and eventually they decided it was time to jump into a full frame mirrorless system but their first cameras were far from what I required as outlined above.

NOW, their Canon EOS R6 and their far more expensive R5 camera announced this week FINALLY have the features I have been wanting but which only Olympus and then Sony have provided.

The photography media world has been busy writing the obituary for the Micro Four Thirds but these cameras along with the lovely new Canon RF lenses are just as likely to spell the end of the Canon EF dSLR and Nikon F dSLR systems as unlike Micro Four Thirds, they offer very few benefits over the Canon RF system – mainly only the optical viewfinder and better battery life.

For the full specs and other details of these cameras see my wikipedia pages.

The Canon R6 as an E-M1 Mark III on steroids?

The Canon R6 is essentially a larger, heavier full frame version of the Olympus OM-D E-M1 Mark III in terms of its shooting and video capabilities.

Similarities between the two:

  • excellent weathersealing (E-M1 is IPX1-rated and much better than the R6 which is similar to the Canon 6D mark II)
  • excellent sensor-shift image stabilisation (6+ EV)
  • excellent Eye AF subject tracking although the Canon would appear to have the better system with wider frame coverage and ability to track animals as well.
  • excellent ergonomics (although the Canon is a bit big and heavy for my liking being almost 20% heavier)
  • full swivel rear touch screen (although R6 has twice the resolution)
  • 20mp sensor
  • improved rolling shutter (but will the Canon R6 be as good as the Olympus – this is important for allowing electronic shutter and video to be useful and this has many other roll on effects as well)
  • fast mechanical shutter burst rates with AF (10fps for E-m1 vs 12fps for R6)
  • fast electronic shutter burst rates with AF (18fps for E-m1 vs 20fps for R6)
  • mechanical shutter to 1/8000th sec
  • pro-rated shutter durability (E-M1 is rated to 400,000 actuations)
  • reasonably fast flash sync (1/250th sec for E-m1 vs 1/200th sec for R6)
  • 4K video (only 30p on the E-M1 while the R6 can get to 60p with 1.07x crop)
  • 1080HD video to 120p
  • excellent video image stabilsation and AF tracking (the lower weight of the E-M1 makes it far better for selfie hand held vlogging though)
  • zebra exposure warnings
  • USB-C charging
  • Bluetooth and WiFi, microHDMI ports
  • webcam software
  • Dual SD card slots
  • PASM dial instead of a top LCD panel
  • rear joystick controller
  • ability to shoot in AF with Canon EF lenses via adapters
  • optional additional battery grips for portrait aspect holding
  • and many more similar features

Specific advantages of the Canon R6:

  • full frame sensor allows
  • 2 stops shallower DOF but only if you use lenses with wider apertures such as the f/1.2 lenses and some of these are VERY expensive!
  • probably 2 stops better high ISO performance for moving subjects as long as you don’t need to stop down to attain sufficient DOF
  • 14 bit files instead of 12 bit gives marginally better image quality
  • 4K 60p mode
  • higher resolution EVF (3.69mdot vs 2.3mdot on the E-M1)
  • AF covers almost 100% of frame while the E-M1 covers around 80%
  • bigger camera may better suit those with large hands
  • ability to output 10-bit HDR HEIF files for stills and video
  • option of closing the mechanical shutter to reduce dust when changing lenses but this then exposes the fragile shutter to damage
  • both SD card slots are UHS-II (the E-M1, only one slot is UHS-II)
  • a new post-processing “portrait lighting” and “background clarity” AI processing option similar to that found on smartphones, although these are probably better applied in computer post-processing.
  • option of purchasing a higher resolution camera – the Canon R5
  • a brighter future – the Canon RF is likely to rule the camera world along with Sony while Olympus has already announced it will sell off its imaging division and this places future product developments at substantial risk even with Panasonic still around.

Advantages of the Olympus E-M1 mark III:

  • smaller and lighter (20% lighter)
  • far better weather sealing and build quality (less plastic)
  • more affordable (the R6 costs 50% more! $US2499 for the R6 vs $US1699 for the E-M1 III)
  • more affordable and greater variety of premium quality native lenses
  • twice the telephoto reach for a given size lens (although Canon has attempted to address this with their two new 600mm and 800mm f/11 spotting scope-like diffraction optics lenses which we will have to see how well they work but they are likely to lack the quality and versatility of the Olympus 300mm f/4 lens especially in low light, but at least they are cheap!)
  • ability to take a 400mm telephoto reach lens to commercial sports events (many events limit focal length to 200mm so the 2x crop factor of the E-M1 becomes a major advantage here!)
  • 15fps mechanical shutter burst mode with fixed focus
  • 60fps electronic shutter burst rate with fixed focus
  • 1/32,000th sec electronic shutter
  • ProCapture mode to ensure shots are captured despite human reaction time
  • Improved AF accuracy by having an in-built focus range limiter which can be used on any compatible lens and allows the user to instruct the camera to ignore subjects closer or further than the set range – this means no more accidental locking on spectators in the background
  • sensor-shift Hi-Res modes 50mp hand held and 80mp tripod versions with much reduced moire artefacts
  • hand held multi-shot Live ND filter effect mode
  • Live keystone correction
  • Unique night modes such as Live Composite and Live Timed
  • Starry AF mode
  • the best sensor dust removal system available (although the R6 has the option of closing the mechanical shutter to reduce dust when changing lenses but this then exposes the fragile shutter to damage)
  • 2×2 settings mode switch
  • better exposure compensation, bracketing options (R6 only has 3 stops compensation while the E-M1 does 5 stops)
  • better battery life (CIPA 420 shots compared with 380 on the R6)

Conclusion:

The Canon R5 is certainly the camera that many of us have been waiting for Canon to produce for over 10 years but it does come at a high price point of $US2499 which will put it out of reach for many, particularly if that want to maximise its potential by using the new awesome Canon RF glass such as:

  • Canon RF 85mm f/1.2L USM $US2699 and weighs 1.2kg!
  • Canon RF 50mm f/1.2L USM $US2299 and weighs 950g
  • Canon RF 70-200mm f/2.8L IS USM $US2699 and weighs 1070g
  • Canon RF 24-70mm f/2.8L IS USM $US2299 and weighs 900g

As you can see above, if you really want to go the pro full frame premium route it is going to cost you a LOT of money to get those 2 stops of DOF and higher ISO performance compared to Micro Four Thirds, not to mention it will be big and heavy!

In comparison, Micro Four Thirds gives up that 2 stop DOF advantage but you can get:

  • Olympus 45mm f/1.2 $US1299 and weighs 410g
  • Olympus 25mm f/1.2 $US1299 and weighs 410g
  • Olympus 40-150mm f/2.8 $US1349 and weighs 760g and gain 50% more telephoto reach
  • Olympus 12-40mm f/2.8 $US999 and 382g

The Canon RF lens kit as above will cost $US9,999 and weigh 4.1kg excl. camera.

The Olympus lens kit as above will cost $US4,999 and weigh 2kg excl. camera and the lenses generally focus closer (eg. the 45mm focuses to 0.5m instead of 0.85m for the Canon 85mm) and they have a very useful manual focus clutch.

The Canon RF lenses will thus cost TWICE as much and be TWICE as heavy while the R6 is 50% more pricey then the E-M1 III and 20% heavier – the choice is yours – do you want to break your bank and your back and get that ultra shallow DOF and high ISO performance or settle for the Olympus and get greater hand holdable telephoto reach as a bonus plus a range of extra functionality as outlined above?

This price and weight difference is further exaggerated if you start considering super telephoto lenses at 600mm full frame reach or more.

Yes, you can get the new Canon RF 600mm and 800mm f/11 lenses, but when I shoot with the Olympus 300mm f/4 lens I am usually using ISO 400 in good light to get sufficient shutter speed for action, if I were to shoot with the Canon 600mm f/11 I would need ISO 3200 (3 stops higher) – if the light drops, you will quickly be getting up to very high ISO levels on the Canon! Furthermore, I suspect the image quality of these lenses will not match that of the Olympus 300mm which is one of the highest quality lenses Olympus has ever made and you do lose 1 stop DOF with those f/11 lenses.