The megapixel race is apparently still on .. Sony has upped the ante in the full frame sector with their 61mp Sony a7R Mark IV which can also do a 16 shot sensor shift 240mp image.
Fujifilm has their new 100mp Fujifilm GFX100S medium format camera.
Whilst many professionals and enthusiasts have very valid reasons for needing such high resolution cameras, these come at a cost not only in terms of purchase price and file storage costs but also in terms of post-processing frustrations due to their massive file sizes.
The Sony a7R IV is said to have 124Mb RAW files and apparently if you shoot the 16 shot Hi Res image you will be up for a 2Gb file!
Unfortunately, they have not allowed you to have a full frame RAW file in lossless format at lower resolution so that means you are committed to shooting every one of your full frame shots at 61mp – although you do have an option for a 62Mb compressed lossy RAW file or a 24mp APS-C crop file.
Let’s see what happens to file sizes in post-processing
I recently decided to purchase Affinity Photo to play with as it has been many years since I used Photoshop and I am certainly not going to be paying Adobe in my retirement an annual subscription fee just so I can re-use my old edits.
So far I have been impressed with Affinity Photo, and perhaps will write a more detailed analysis of some very cool things it can do for your photography at some later time, in the meantime you can check out resource links and video links on my wiki page here.
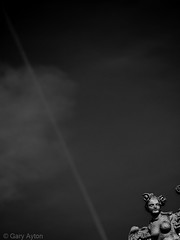
I went for a walk up onto the nearby mount on the weekend, and yes it was cold, but I needed the exercise, and on my way up, I took this quick hand held shot with my Olympus OM-D E-M1 Mark II with the Olympus mZD 60mm macro lens (I decided to travel extra light!).

This was the image straight from camera with Olympus Natural profile, autoWB and just resized for the web using Lightroom v6.
The RAW file of this 20mp 12bit image was a lovely, easy to handle 19Mb – yes, no problem shooting off a hundred or so of these on a shoot, or shooting at 18fps at a sports event or capturing wildlife.
But after watching a video tutorial or twenty on how to play with Affinity Photo, I decided I would create some light rays and a touch of fog from the highlights of this image without adding in ready made ones.

After a bit of experimenting I came up with the above, I am not sure it really is an improvement on the original, I am feeling it is much like some music which has too many notes in it, but each to his own, some people like Rachmaninoff instead of Pink Floyd.
The point I have been labouring to get to is that this above file in Affinity Photo’s internal format in 16bit AdobeRGB is no longer 19Mb but a whopping 1GB thanks largely to its use of layers, and that is not even a complex post-processing case!
Now if my simple 19Mb image gets to 1Gb so easily, just imagine how your poor high end computer is going to strain with playing with a 61mp 124Mb file that is already almost 10x the size, let alone starting off with a 2Gb HiRes file!
There are better ways to improve your photography than just by megapixels
For some purposes you may just need the extra megapixels, but in many instances you actually will get better photos by taking a number of shots depending upon your needs such as:
- managing high contrast scenes with HDR exposure bracketing
- managing depth of field by using focus stacking
- managing transient imagery such as fireworks by blending images in a similar way to Olympus Live Composite mode
- managing high ISO noise by stacking 10-50 images to average out the noise
- creating a panoramic stitch to give you more detail and more scene coverage
- shooting a burst of images to ensure you have captured the correct moment
A high resolution camera such as a 61mp full frame may well give you 61mp but if there is camera shake, subject movement, marginal focus error, high ISO or use of an older lens, then those 61mp may well be wasted but you still end up with having to deal with the massive files.
At the top of my walk up the mount I was greeted by real sun rays, no Photoshopping here to add them in (but you can watch this video on how to add in God’s rays to your images using Affinity Photo if that’s your thing).
These scenes are not simply captured in one shot as the dynamic range is far too great – for this I resorted to a 3 shot hand held exposure bracket and then used Affinity Photo’s awesome HDR tools to align the 3 images and perform 32bit tone mapping and some contrast adjustments and cropping to 16:9 aspect ratio and a 249Mb image.
I ended up with the following lovely little shot (the individual single shot exposures looked terrible due to the high contrast, but combined, they now look more like how my eyes witnessed this scene):

You need to open this up in a separate tab by clicking on it.
