How to remove an embedded fish hook
photos taken hand held in fluorescent room lighting using Olympus E510 with IS and custom WB, ZD 50mm macro lens at f/3.5, 1/30th-1/50th sec, ISO 800
disclaimer: this is only to demonstrate use of cameras in a clinical environment - use of clinical content at your own risk.
Rule 1: you can't just pull out a fish hook as the barb will stop you or at least cause more damage coming out backwards.
Rule 2: this hurts a bit so use some local anaesthetic first
Rule 3: fish hooks are usually dirty so ensure tetanus coverage is up to date and discharge patient on antibiotics (eg. cephalexin), and warn patient of risk of infection and the need to return ASAP if increasing pain, redness or pus occurs.

here is our fish hook, fortunately it seems to miss the interphalangeal joint - otherwise exploration & wash out in theatre would be appropriate.
furthermore, the point has already started to exit, otherwise consider rotating hook to select an exit point that is likely to do the least damage (ie. ensure it misses the digital nerve or artery).
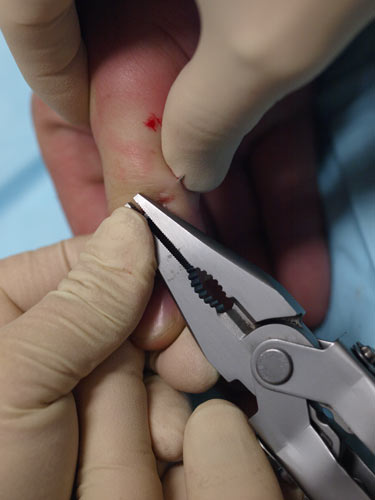
first we need to cut off most of the hook so we can thread the remaining part THROUGH the thumb and OUT via the exit point.

this hook was a tough one and needed quite a bit of force with these pliers.

here is the bit we left behind

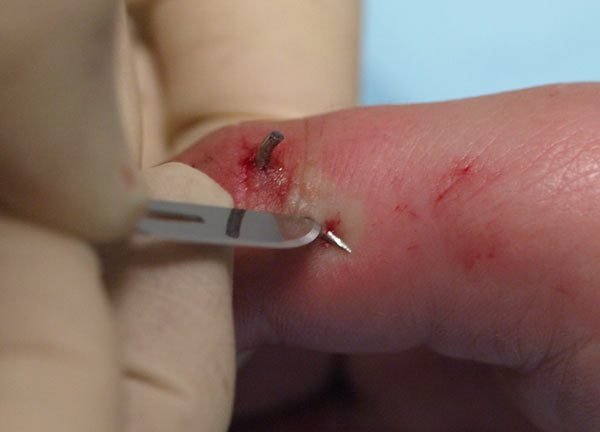
as it was a bit tough pushing the barb through the exit point, we enlarged the exit point marginally with a scalpel

here we are pushing the hook through with a rotating action similar to suturing whilst applying some pressure on the skin near the exit point to help stabilise it.

after first pushing the hook from the entrance end, we then grabbed the exit point of the hook and pulled on it - again quite firmly.

here is the hook almost fully out of the wound.
copyright 2007 Gary Ayton