One of the main problems with macrophotography is inadequate depth of field – that is, not being able to get your whole subject in adequate focus.
In the macrophotography realm, it is common to only have around 1-2mm of subject depth in focus, forcing one to either use very small apertures such as f/16 (which then drops resolution due to diffraction effects, increases how annoyingly busy the background is as well as requiring much longer exposures).
Die hard macrophotographers resort to a very complex, time consuming technique to address this called focus stacking whereby they take a number of shots at slightly different focus distances and then on a computer, use special software to merge these together to give an apparent expanded depth of view.
Olympus has recently come to the rescue for those of us who are not quite as obsessive, and added a brilliant little feature to their latest cameras which does all this automatically – albeit, with some limitations, critically you can only do 8 shots, you have to use the electronic shutter, and the final merged image is a slightly cropped jpeg image – not a RAW file, so you really need to get your exposure correct, your white balance correct (DON’T USE Auto White Balance!) and your picture style correct BEFORE you shoot.
For more information on this, see Olympus focus stacking feature on my wikipedia.
It does take a little trial and error in choosing the best aperture and the step differential for a given lens and subject.
The step differential is the distance the camera will adjust the lens focus between each shot, and Olympus allow you to choose a number between 1 and 9, but they incorporate a complex algorithm to determine how much 1 step equates to depending upon the aperture and focus distance chosen – in practice it seems that 1 step is approximately 1/3rd of the depth of field, and thus for most subjects you probably are best to use a setting of 3-5.
All of the following were shot with the Olympus OM-D E-M1 II Micro Four Thirds camera with Olympus mZD 60mm f/2.8 macro lens (jpegs straight from camera just re-sized for web), and whilst not true 1:1 macros, they are good examples of what most people might try outdoors:
Here is a single shot straight from camera to show that you can often get away without focus stacking by using a small aperture, but the cost is a very busy background – this is a small 2cm toadstool attached to the side of a eucalypt tree in a dark forest shot at f/16 with an 8 sec exposure at ISO 200:
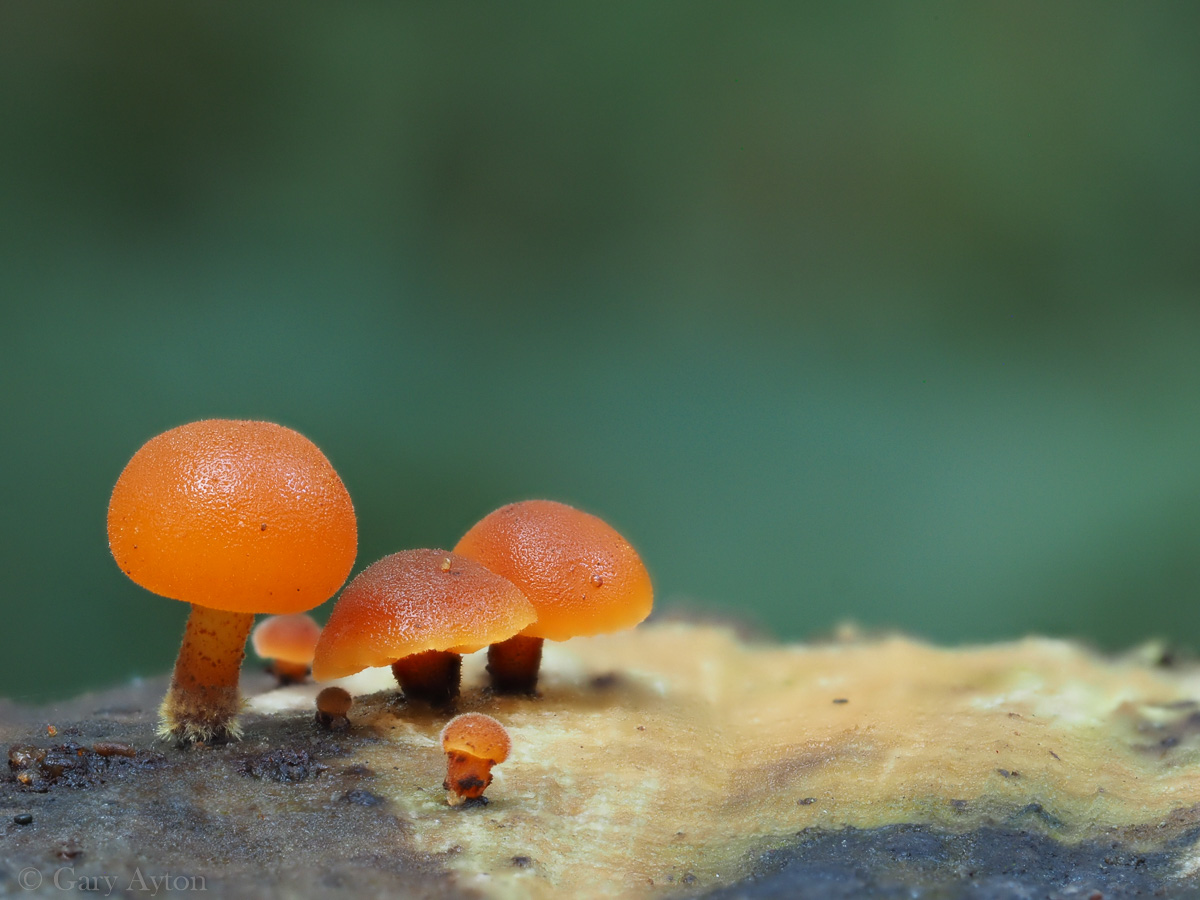
Here is the same shot taken with automatic in camera focus stacking, 8 images, f/4 at 0.5 sec at ISO 200 – note it is slightly cropped, but the background is now a lovely soft blur while the mushrooms are still adequately in focus – just amazing that the camera’s algorithms can create such an image!
Here is a closer shot of same subject at f/6.3, 0.6sec, ISO 200 with 8 image focus stacking:
Another example of some tiny mushrooms on a tree stump taken with focus stacking – without focus stacking I could only get 1 or 2 of these in focus even using a small aperture, and even with 8 image focus stacking I needed to resort to f/11, 2 sec exposures at ISO 200 to get as much as this in focus. These were only about 8mm height for the tallest one:
One more example, of a larger group of mushrooms which had a dead mosquito stuck to the surface and a couple of minute mite-like insects nearby – this was taken with the 8 image focus stacking at f/8, 0.5 sec at ISO 200 and the image has been cropped into portrait aspect (it was getting late and dark and I couldn’t be bothered adjusting the camera into portrait on the tripod and re-composing).
Not all shots will work for you, and you do need to avoid camera shake when triggering the exposure – unfortunately, it seems you cannot set a self timer delay in this mode, and you must remember to focus on the CLOSEST part you want in focus – the bracketing is a bit of a misnomer here as it doesn’t bracket either side of your focus point.
In addition, you need to use a tripod, and a lens which is compatible with this mode, and remember to reset your manual focus after each shot.
The native live view of mirrorless cameras, ability to get accurate manual focus with magnified view, and the ergonomics of the flip out screen makes this kind of photography far more enjoyable than with a clunky dSLR. It would be nice if the Olympus smartphone app allowed focus stacking in remote control as this would allow a total no touch technique and less camera shake, but alas it doesn’t as yet.
You will be surprised at how useful this is.
Of course, if you want the BEST image quality you should use focus bracketing mode without in-camera focus stacking to give you a self timer and lots more images to play with – this will allow you may to use a smaller step differential of 1-2 and MANY images – perhaps a hundred! Then you can load them up in your favorite focus stacking software and hopefully get less artefacts.


